Dungeonbound Beginner Progression & Economy Guide
In Dungeonbound, every Roguelike Climb, Daily, and Co-op run begins with 10 Hearts (-1 on Floors 1–2, -2 on Floors 3–4, -3 from Floor 5). Standard Climbs win at Floor 6 (with Endless optional past 6), Versus fights a shared-seed final after Floor 8, and winning economy hinges on high-payout ?/fight exits, a 70% sell cap, doubling shop rerolls scaling +3g per floor (10g on Floor 1, 22g on Floor 5, 31g on Floor 8, 52g on Floor 15), and Shop BAN thinning.
1. Campaign vs. Roguelike Climbs vs. The Daily
Choosing the right mode dictates how your progression persists and how enemies scale across floors. Incremental Campaign acts as a long-term revenge arc after your village is burned: runs survive quitting, gems have no limit in Campaign loadouts, loadout slots unlock a whole row at a time, and a RESET SKILL TREE option refunds every upgrade except hero/feature unlocks.
By contrast, Roguelike Climbs, Co-op, and The Daily Meets Death evaluate each climb independently with 10 starting Hearts. Standard Climbs award victory after beating Floor 6 (updated from Floor 8 in v0.1.46), with optional Endless floors continuing afterward, while 1v1 and 2v2 Versus races fight a final showdown after Floor 8. PvE Only mode lets you toggle Rival Fights off so every second floor features a dungeon boss instead of asynchronous player boards. In The Daily Meets Death (reworked in v0.1.58), both solo and co-op dailies run strictly for 10 floors with no endless mode and end in a rainy graveyard encounter against Death, where total damage dealt to Death determines your leaderboard score.
2. The 10-Heart Curve & Rival Scaling
Every climb starts with 10 Hearts, and losing later battles punishes risky greed much harder than Floor 1 defeats. Computer rivals on Floors 5 through 14 receive 1.25× HP and Dmg (reduced from 1.45× in v0.1.58). From Floor 4 onward, player rivals replace plain monsters on main routes, and defeating a rival always drops one of their own equipped pieces highlighted with a glow. After any defeat or completed run, open The Grave—the headstone end-of-run summary screen showing your final grid layout, floor reached, and outcome alongside the in-run LAST BATTLE and ENEMY DAMAGE breakdown logs.
| Encounter & Shrine Behavior | |||
|---|---|---|---|
| Floors 1–2 | 1 Heart | 10g (F1) / 13g (F2) | Floor 1 includes two monsters, an elite, and a Jerry before shrines; Fusion Forge is rare on Floor 1 and peaks on Floors 2–3. |
| Floors 3–4 | 2 Hearts | 16g (F3) / 19g (F4) | Floor 3 remains prime Fusion Forge territory; Floor 4 transitions encounters to player rivals and eliminates plain monsters on side paths. |
| Floors 5–7 | 3 Hearts | 22g (F5) / 25g (F6) / 28g (F7) | Floor 5 almost always spawns a Mega Forge; computer rivals scale to 1.25× HP and Dmg; standard Climbs win at Floor 6. |
| Floors 8–14 | 3 Hearts | 31g (F8) – 49g (F14) | Floor 8 hosts 1v1/2v2 Versus finals (Endless Climb continues past 6); Floor 10 (37g base) almost always spawns a Mega Forge and ends The Daily vs Death. |
| Floor 15+ | 3 Hearts | 52g+ (+3g/floor) | Reroll base reaches 52 Gold at Floor 15 and doubles on every repeat spin inside the same shop. |
3. Gold Routing, Shop Rerolls & BAN Rules
Three hard economy limits introduced in v0.1.58 prevent infinite shop loops and force deliberate Gold spending:
- 70% Maximum Sell Value: Selling any item never pays more than 70% of its worth, and shop discounts cap at 28%, ensuring you cannot profit by buying discounted items just to sell them back.
- Doubling Reroll Costs: Shop rerolls start at 10g on Floor 1 and step up by +3g per floor (13g F2, 16g F3, 19g F4, 22g F5, 25g F6, 28g F7, 31g F8, 37g F10, 52g F15) and double each time you reroll in that shop. Relics like Loaded Dice grant 3 free rerolls per shop plus a 25% chance of an extra boosted ware.
- Path Exit Gold & Level-Kept Drops (v1.0.12): Every route node displays its exit Gold payout directly on the map and over the doorway. Routes filled with
?mystery stops and combats pay more Gold than shrine- or shop-heavy paths, and under Patch v1.0.12, drops keep their item level. - Shop BAN Zone (Bans Cursed Variants in v1.0.12): Every shop includes a BAN drop zone. Drag an unwanted item onto BAN and pay its shop price to delete both its standard and cursed versions (
v1.0.12) from all shops for the rest of the current run. - Abandoning vs. Fighting Death vs. Normal Defeat: Losing all 10 Hearts naturally ends the climb with no penalty to your next run. By contrast, abandoning an active climb early forfeits your Floor 1 relic pick on the very next climb (
v0.1.51+), and under v1.0.12, choosing Abandon in any run also offers the option to immediately face Death with your current board before ending (see the Death Boss & Daily Guide).
| Item Shop Price | Initial Shrine Use | 1st Reuse (60%) | 2nd Reuse (85%) | 3rd Reuse (110%) |
|---|---|---|---|---|
| 20 Gold | Free | 12 Gold | 17 Gold | 22 Gold |
| 40 Gold | Free | 24 Gold | 34 Gold | 44 Gold |
| 80 Gold | Free | 48 Gold | 68 Gold | 88 Gold |
Because each repeat upgrade during the same shrine visit scales by +25% of the staged item's shop price, consolidate two components at a Floor 2–3 Fusion Forge before paying for Altar reuses—see the Forge & Shrines Guide for full shrine details.
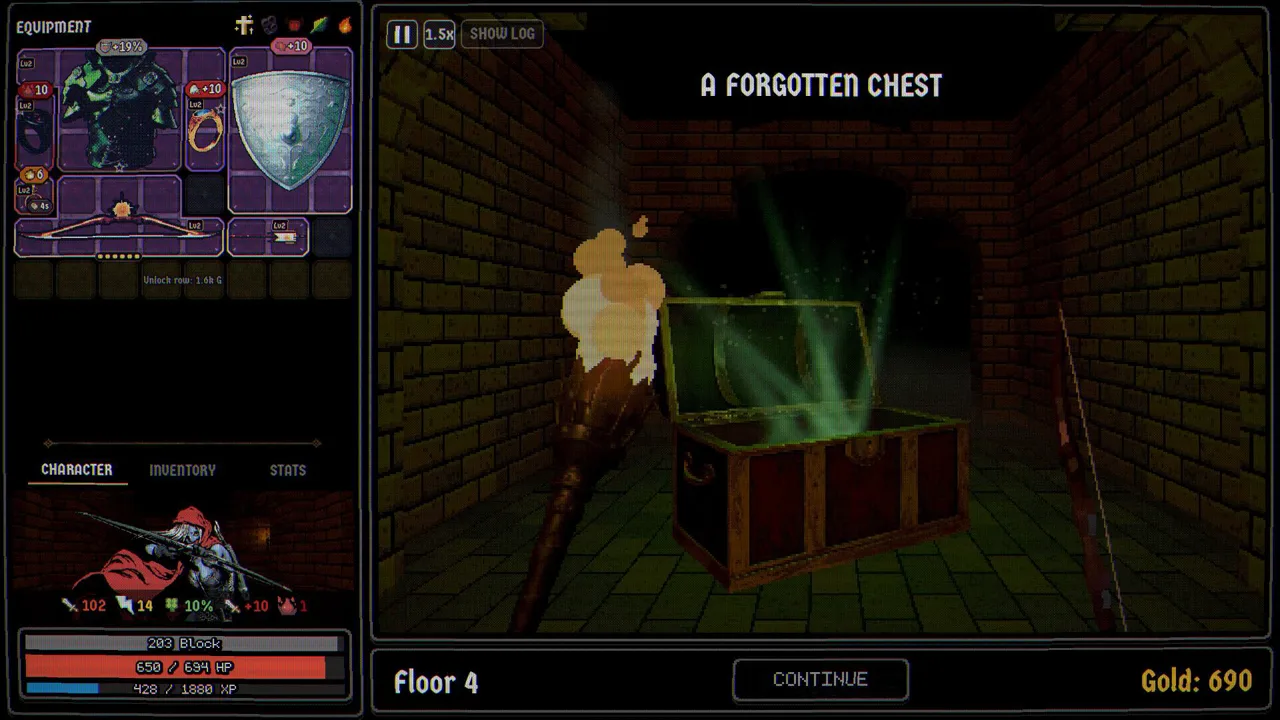
4. Floor 1–8 Winning Execution Checklist
- Inspect Floor 1 Exit Gold: Check the map payouts before picking your first turn; favor combat or
?routes if you need fast Gold for early Forge or Shop BAN buys. - Lock Key Combos & Search Tags: Use the inventory search box (added in v0.1.51) and click type tags to highlight matching synergies; lock core pieces so
SELL ALLnever clears them. - Never Over-Reroll on Floors 1–4: Stop after 1 or 2 shop rerolls (10g → 20g) unless you hold Loaded Dice; save Gold for Floor 2–3 Fusion Forges and Upgrade Altars.
- Take Free Shrine Retry Buffers: If you lose a Heart, remember the retried floor provides a shrine immediately after the shop so you can pivot before facing the rival again.
- Review Enemy Damage After Losses: Open the
ENEMY DAMAGEandLAST BATTLEbreakdowns to see whether raw hits, crits, or status stacks bypassed your Block. - Consolidate Before Floor 5: Arrive at Floor 5 with an open Mega Forge candidate pair or high-tier socketed weapon so the 3-Heart penalty does not knock you out.
5. Video Overview: Core Loop & Modes
Jerry Plays breaks down Dungeonbound's backpack grid arrangement, Warrior/Mage/Rogue starting styles, item fusion, runes, and the contrast between Roguelike Climbs, Incremental Campaign, Daily runs, and 4-player Co-op, while Game Launch Central highlights 10 practical early-run habits—including adjusting battle speed, alternating between Roguelike Climbs and Incremental Campaign progression, prioritizing rune overlap over raw rarity, and weighing Shrine Gold costs against Fusion Forges.
Jerry Plays reviews core inventory combat, gear fusion, runes, and multiplayer climb pacing. Watch on YouTube
Game Launch Central covers 10 early-climb habits: rune overlap, battle speed toggles, Shrine cost discipline, and Campaign/Roguelike rotation (00:32–10:03). Watch on YouTube
Sources
- Dungeonbound on Steam (App 5200620)
- Dungeonbound Update v1.0.12 + ROADMAP (Drops Keep Level, BAN Cursed Sync, Abandon to Death)
- Dungeonbound v0.1.58 Patch Notes (Hearts, Shops, Daily, Economy)
- Dungeonbound v0.1.51 Patch Notes (Lock, Search, Loaded Dice)
- Jerry Plays — Dungeonbound Inventory-Based RPG Overview (YouTube)
- Game Launch Central — Dungeonbound 10 Tips to Start the Right Way (YouTube)
| Dungeonbound Encyclopedia & Strategy Index (Patch v1.0.12) | |
|---|---|
| Core Systems | |
| Items & Builds | |
| Endgame & Modes | |
Community Discussion (0)